Save Zoom Cloud Recordings to Google Drive
This article is out of date. Zoom Cloud Recordings are now automatically saved to the hosts Google Drive account.
We have very limited space in the Zoom Cloud to save recordings. To keep these recordings, you need to save them somewhere else such as Google Drive.
Step-by-step guide
Setup Google Drive File Stream
If you haven't already done so, setup Google Drive File Stream to access your Google Drive files from Windows File Explorer
- Click on the Start Menu or click directly on the Drive File Stream icon on the task bar
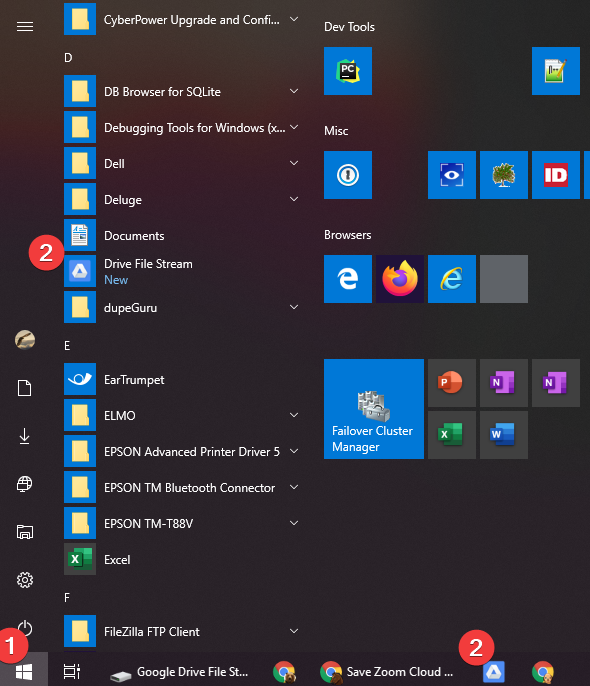
- Click on the Drive File Stream icon
- Follow the prompts to sign into your Google account
Decide where to save recordings in Google Drive
Organizing your files is important for being able to find them later. Decide where in your Google Drive you want to save your recordings.
Saving your recordings in your Google Classroom folders will easily organize your class recordings and allow your students direct access to the recordings.
Change Google Chrome download settings
Telling Chrome to ask you where to save each file will increase your organization of files without having to move/copy files after they are downloaded.
- In Chrome, click on the 3 dot button for the menu
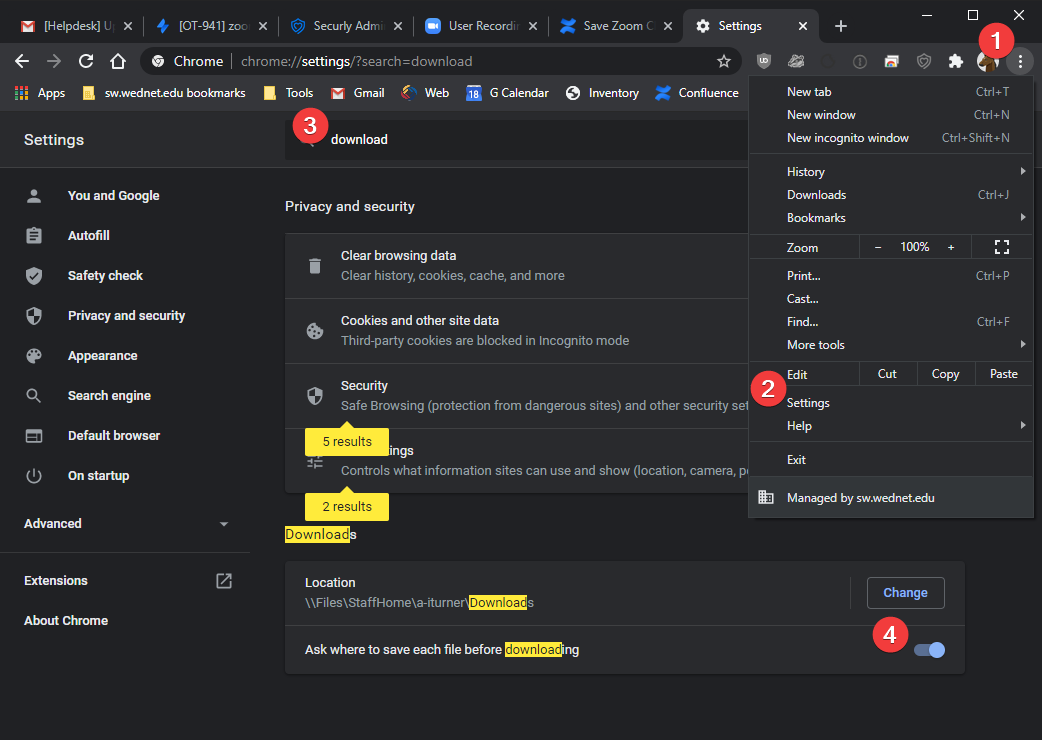
- Click on Settings
- Search for download in the Settings search box
- Enable "Ask where to save each file before downloading"
Download Zoom recordings to Google Drive
- Navigate to your Zoom Cloud recordings https://southwhidbey.zoom.us/recording
- Click on the recording you want to download
- Click on Download (# files)
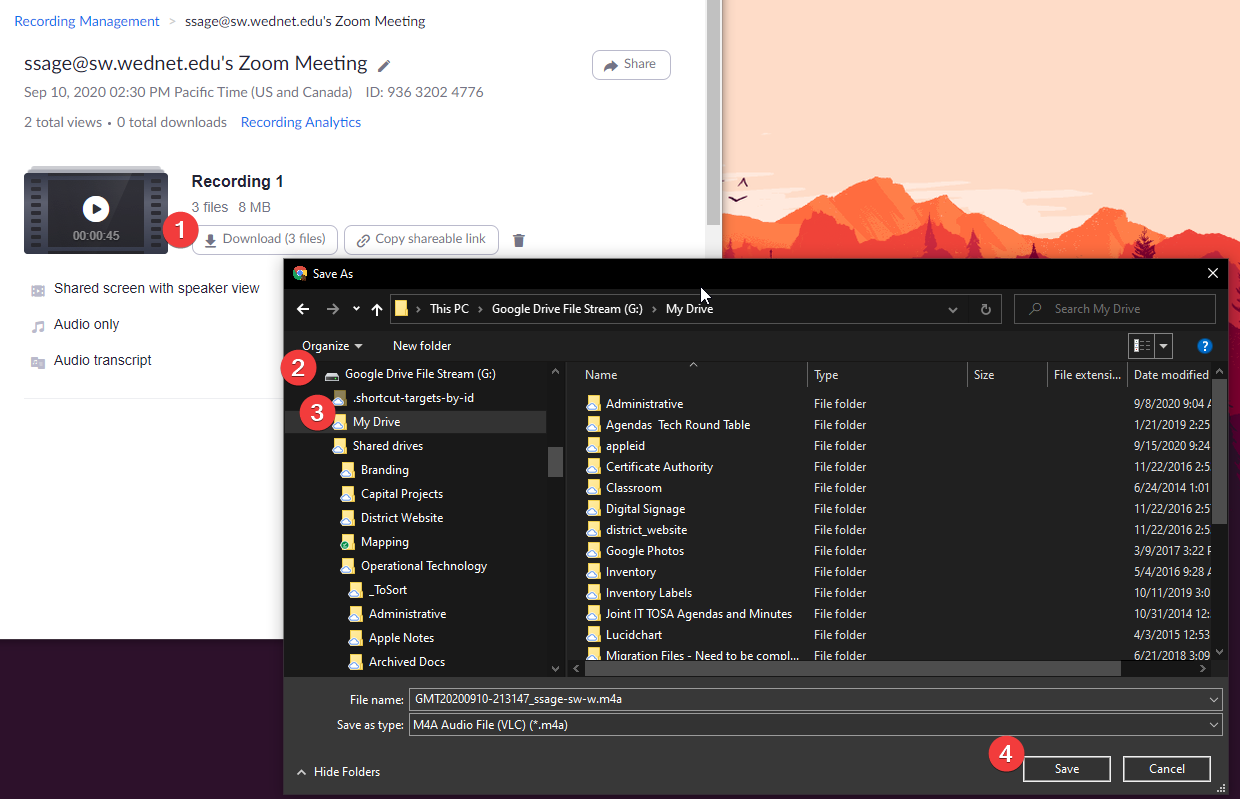
- The Save As window appears, navigate to where you want to save this recording
- Give it a name if you choose
- Click Save
- Repeat steps 4-6 for each Save As window that appears
- Wait for the files to upload to Google Drive
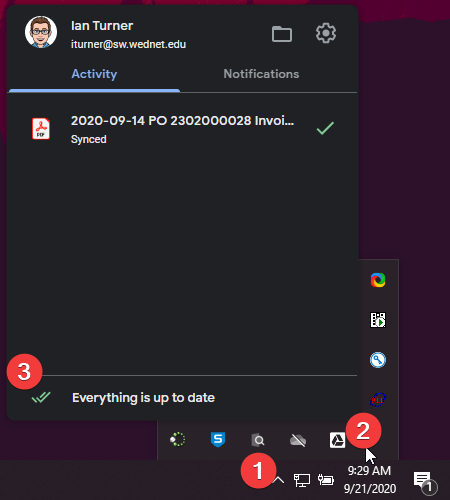
- Click on the ^ in the notification area
- Click on the Drive File Stream icon
- Wait for "Everything is up to date" to display
Related articles
-
Page:
-
Page:
-
Page: